Dark Mode Screenshots with Puppeteer and Playwright
Learn how to capture dark mode screenshots with Puppeteer and Playwright — including prefers-color-scheme emulation, class-based dark mode, dual-mode capture, and edge cases with images and third-party embeds.
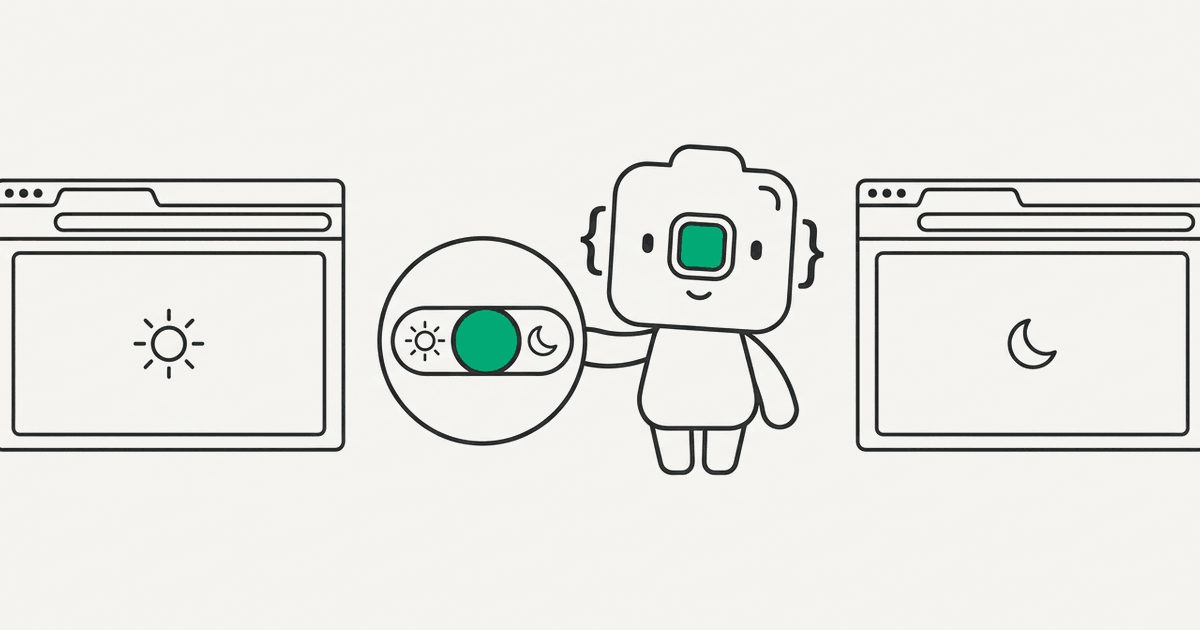
Dark mode has gone from a niche preference to a default expectation. Most major websites and web applications now ship with dark mode support, and operating systems across desktop and mobile have made it a first-class setting. Whether you need dark mode screenshots for documentation, visual regression testing, or social cards, you need a reliable way to programmatically toggle color schemes in headless browsers.
This guide covers everything you need to know about capturing dark mode screenshots with both Puppeteer and Playwright. We'll start with how the underlying CSS mechanism works, walk through the specific APIs each tool provides, handle the tricky class-based dark mode implementations, build a complete dual-mode capture script, and work through the edge cases that trip people up in production.
How prefers-color-scheme Works
Before diving into automation, it helps to understand the CSS mechanism that powers dark mode on the web. The prefers-color-scheme media query lets websites detect whether the user has requested a light or dark color theme at the operating system level.
Here is a simple CSS example:
/* Default (light mode) styles */
body {
  background-color: #ffffff;
  color: #1a1a1a;
}

a {
  color: #0066cc;
}

/* Dark mode styles */
@media (prefers-color-scheme: dark) {
  body {
    background-color: #121212;
    color: #e0e0e0;
  }

  a {
    color: #66b3ff;
  }
}
When a user enables dark mode in their operating system settings, the browser reports that preference to every page it loads. The @media (prefers-color-scheme: dark) block activates, and the page renders with dark colors. This happens entirely in CSS — the JavaScript on the page doesn't need to do anything.
The important thing for screenshot automation is that browsers expose this as something the automation tool can override. You don't need to change the operating system setting on the machine running your headless browser. Both Puppeteer and Playwright provide APIs to tell the browser to report a specific color scheme preference, which is exactly what we need.
There is also a light value for the media query, which matches when the user has explicitly chosen a light theme or hasn't expressed a preference. In practice, most sites treat the absence of a dark preference as light mode, so the default browser behavior (without any emulation) gives you light mode screenshots.
Puppeteer: emulateMediaFeatures
Puppeteer provides the page.emulateMediaFeatures() method to override media feature values. This method accepts an array of feature overrides, and prefers-color-scheme is one of the supported features.
Here is the core API call:
await page.emulateMediaFeatures([
  { name: 'prefers-color-scheme', value: 'dark' }
]);
This tells the browser to report dark as the user's preferred color scheme for this page. Any CSS that uses @media (prefers-color-scheme: dark) will activate, and any JavaScript that checks window.matchMedia('(prefers-color-scheme: dark)') will return a match.
Here is a complete, copy-pasteable example:
const puppeteer = require('puppeteer');

(async () => {
  const browser = await puppeteer.launch();
  const page = await browser.newPage();

  // Set viewport
  await page.setViewport({ width: 1280, height: 720 });

  // Emulate dark mode BEFORE navigating
  await page.emulateMediaFeatures([
    { name: 'prefers-color-scheme', value: 'dark' }
  ]);

  // Navigate to the page
  await page.goto('https://example.com', {
    waitUntil: 'networkidle0'
  });

  // Capture the screenshot
  await page.screenshot({ path: 'dark-mode-screenshot.png' });

  await browser.close();
})();
A critical detail: call emulateMediaFeatures() before page.goto(). Some websites read the color scheme preference during their initial page load and cache the result in JavaScript variables or apply classes based on it. If you set the emulation after the page has already loaded, those sites may not fully switch to dark mode because their JavaScript already ran with the light mode preference.
If you set the emulation before navigation, the preference is already active when the page's CSS and JavaScript first execute, which produces the most reliable results.
You can also override multiple media features at once:
await page.emulateMediaFeatures([
  { name: 'prefers-color-scheme', value: 'dark' },
  { name: 'prefers-reduced-motion', value: 'reduce' }
]);
This is useful when you want dark mode screenshots without CSS animations running during capture — prefers-reduced-motion: reduce tells the page to skip animations, which can help avoid partially-animated states in your screenshots.
To reset the emulation and go back to light mode:
await page.emulateMediaFeatures([
  { name: 'prefers-color-scheme', value: 'light' }
]);
Or to clear all media feature overrides entirely:
await page.emulateMediaFeatures([]);
Playwright: Context-Level colorScheme
Playwright takes a different approach that is cleaner in most scenarios. Instead of emulating individual media features on a per-page basis, Playwright lets you set the color scheme at the browser context level.
const context = await browser.newContext({
  colorScheme: 'dark'
});
Every page created within that context will automatically use the dark color scheme. Here is a complete example:
const { chromium } = require('playwright');

(async () => {
  const browser = await chromium.launch();

  // Create a context with dark mode
  const context = await browser.newContext({
    colorScheme: 'dark',
    viewport: { width: 1280, height: 720 }
  });

  const page = await context.newPage();

  // Navigate — dark mode is already active
  await page.goto('https://example.com', {
    waitUntil: 'networkidle'
  });

  // Capture the screenshot
  await page.screenshot({ path: 'dark-mode-screenshot.png' });

  await browser.close();
})();
The context-level setting has a practical advantage: it applies to all pages and iframes within that context automatically. If the page you are capturing contains iframes — embedded content, widgets, third-party components — those iframes inherit the color scheme from the context. With Puppeteer's per-page approach, you would need to handle iframes separately if they check the media feature.
You can also change the color scheme on a per-page basis if you need to switch mid-session:
await page.emulateMedia({ colorScheme: 'dark' });
This is useful when you want to capture the same page in both light and dark mode without creating a new context:
const { chromium } = require('playwright');

(async () => {
  const browser = await chromium.launch();
  const context = await browser.newContext({
    viewport: { width: 1280, height: 720 }
  });
  const page = await context.newPage();

  await page.goto('https://example.com', {
    waitUntil: 'networkidle'
  });

  // Capture light mode
  await page.emulateMedia({ colorScheme: 'light' });
  await page.screenshot({ path: 'light-mode.png' });

  // Switch to dark mode and capture again
  await page.emulateMedia({ colorScheme: 'dark' });

  // Brief wait for any CSS transitions to complete
  await page.waitForTimeout(500);

  await page.screenshot({ path: 'dark-mode.png' });

  await browser.close();
})();
The available values for colorScheme are 'light', 'dark', and 'no-preference'. The 'no-preference' option tells the page that the user hasn't expressed a preference, which most sites treat as light mode.
Playwright's approach is generally more ergonomic for screenshot workflows because you set the color scheme once as part of your context configuration alongside viewport size, device scale factor, and other settings. It is all declared up front rather than requiring an extra method call before navigation.
Class-Based Dark Mode
Not every website uses @media (prefers-color-scheme: dark) for its dark mode implementation. Many sites use CSS classes or data attributes to toggle between themes. This is especially common with CSS frameworks and sites that offer a manual theme toggle in their UI. For these sites, emulating the prefers-color-scheme media feature won't work — you need to inject the right class or attribute into the DOM.
Tailwind CSS Dark Mode
Tailwind CSS is one of the most popular CSS frameworks, and its default dark mode strategy uses a .dark class on the <html> element. When this class is present, Tailwind's dark: variant classes activate.
To enable Tailwind dark mode in a headless browser, add the class to the document element:
// Puppeteer
const puppeteer = require('puppeteer');

(async () => {
  const browser = await puppeteer.launch();
  const page = await browser.newPage();
  await page.setViewport({ width: 1280, height: 720 });

  await page.goto('https://example.com', {
    waitUntil: 'networkidle0'
  });

  // Inject the dark class onto the html element
  await page.evaluate(() => {
    document.documentElement.classList.add('dark');
  });

  // Wait for any transitions
  await new Promise(resolve => setTimeout(resolve, 500));

  await page.screenshot({ path: 'tailwind-dark.png' });
  await browser.close();
})();
// Playwright
const { chromium } = require('playwright');

(async () => {
  const browser = await chromium.launch();
  const context = await browser.newContext({
    viewport: { width: 1280, height: 720 }
  });
  const page = await context.newPage();

  await page.goto('https://example.com', {
    waitUntil: 'networkidle'
  });

  // Inject the dark class onto the html element
  await page.evaluate(() => {
    document.documentElement.classList.add('dark');
  });

  // Wait for any transitions
  await page.waitForTimeout(500);

  await page.screenshot({ path: 'tailwind-dark.png' });
  await browser.close();
})();
Note that Tailwind CSS can also be configured to use the prefers-color-scheme media query strategy instead of the class-based approach. If the site has darkMode: 'media' in its Tailwind config, the emulateMediaFeatures or colorScheme approach from the previous sections will work. But the class-based strategy (darkMode: 'class') is more common because it gives site owners a manual toggle.
data-theme Attributes
Many component libraries and CSS frameworks use data-theme or similar data attributes instead of classes. DaisyUI, Radix Themes, and various custom implementations use this pattern.
// For sites using data-theme="dark"
await page.evaluate(() => {
  document.documentElement.setAttribute('data-theme', 'dark');
});
// For sites using data-color-mode="dark" (GitHub uses this pattern)
await page.evaluate(() => {
  document.documentElement.setAttribute('data-color-mode', 'dark');
});
// For sites using a color-scheme attribute
await page.evaluate(() => {
  document.documentElement.style.colorScheme = 'dark';
});
The specific attribute name varies by framework. You will need to inspect the site to find out which one it uses.
localStorage Preferences
Some sites check localStorage on page load to determine the theme. The user clicks a toggle, the preference is saved to localStorage, and on the next page load the site reads that value and applies the theme before rendering.
For these sites, you need to set the localStorage value before navigation:
// Puppeteer
const puppeteer = require('puppeteer');

(async () => {
  const browser = await puppeteer.launch();
  const page = await browser.newPage();
  await page.setViewport({ width: 1280, height: 720 });

  // Navigate to the site first to establish the origin
  await page.goto('https://example.com', {
    waitUntil: 'domcontentloaded'
  });

  // Set the localStorage value
  await page.evaluate(() => {
    localStorage.setItem('theme', 'dark');
  });

  // Reload so the site reads the preference on startup
  await page.reload({ waitUntil: 'networkidle0' });

  await page.screenshot({ path: 'localstorage-dark.png' });
  await browser.close();
})();
// Playwright — can use storageState or addInitScript for a cleaner approach
const { chromium } = require('playwright');

(async () => {
  const browser = await chromium.launch();
  const context = await browser.newContext({
    viewport: { width: 1280, height: 720 }
  });
  const page = await context.newPage();

  // Use addInitScript to set localStorage before any page JavaScript runs
  await page.addInitScript(() => {
    localStorage.setItem('theme', 'dark');
  });

  await page.goto('https://example.com', {
    waitUntil: 'networkidle'
  });

  await page.screenshot({ path: 'localstorage-dark.png' });
  await browser.close();
})();
Playwright's addInitScript is particularly useful here. It runs before any JavaScript on the page executes, so the site's theme initialization code will find the dark mode preference already set in localStorage. This avoids the flash of light mode that can happen if you set localStorage after the page has started rendering.
The localStorage key name varies by site. Common keys include theme, color-theme, dark-mode, colorScheme, and preferred-theme. You will need to inspect the site to find the right key.
Detecting Which Method a Site Uses
When you encounter a new site and need to figure out how it implements dark mode, here is a quick inspection approach:
Check the
<html>element. Open DevTools, switch to dark mode using the site's toggle or your OS setting, and inspect the<html>element. Look for added classes (dark,theme-dark) or data attributes (data-theme,data-color-mode).Search the CSS. Look for
@media (prefers-color-scheme: dark)in the stylesheets. If it exists, the site responds to the media query and you can useemulateMediaFeaturesorcolorScheme.Check
localStorage. Open the Application tab in DevTools and look at Local Storage for the site's origin. Toggle the theme and see if any key changes.Look at the JavaScript. Search the page source for
matchMedia,prefers-color-scheme,classList.add('dark'), orsetAttribute('data-theme')to understand the implementation.
Many sites use a hybrid approach — they check localStorage first for an explicit preference, fall back to the prefers-color-scheme media query, and then apply a class to the <html> element. For these sites, you may need to combine multiple techniques: set localStorage and emulate the media feature and add the class.
Dual-Mode Capture Script
Now let's build a complete script that captures both light and dark mode screenshots of any URL. This is useful for documentation, visual comparison, and generating both variants of social cards.
Puppeteer Version
const puppeteer = require('puppeteer');
const path = require('path');

const captureScreenshots = async (url, options = {}) => {
  const {
    width = 1280,
    height = 720,
    deviceScaleFactor = 1,
    outputDir = '.',
    waitUntil = 'networkidle0',
    timeout = 30000,
    darkModeClass = null,
    darkModeAttribute = null,
    darkModeLocalStorage = null,
    delay = 500
  } = options;

  const browser = await puppeteer.launch({
    args: ['--no-sandbox', '--disable-setuid-sandbox']
  });

  const urlSlug = new URL(url).hostname.replace(/\./g, '-');

  try {
    // --- Light mode capture ---
    const lightPage = await browser.newPage();
    await lightPage.setViewport({ width, height, deviceScaleFactor });

    // Explicitly set light mode media feature
    await lightPage.emulateMediaFeatures([
      { name: 'prefers-color-scheme', value: 'light' }
    ]);

    await lightPage.goto(url, { waitUntil, timeout });

    const lightPath = path.join(outputDir, `${urlSlug}-light.png`);
    await lightPage.screenshot({ path: lightPath });
    console.log(`Light mode saved: ${lightPath}`);
    await lightPage.close();

    // --- Dark mode capture ---
    const darkPage = await browser.newPage();
    await darkPage.setViewport({ width, height, deviceScaleFactor });

    // Emulate prefers-color-scheme: dark
    await darkPage.emulateMediaFeatures([
      { name: 'prefers-color-scheme', value: 'dark' }
    ]);

    // Handle localStorage-based dark mode
    if (darkModeLocalStorage) {
      await darkPage.goto(url, { waitUntil: 'domcontentloaded', timeout });
      await darkPage.evaluate((storageConfig) => {
        localStorage.setItem(storageConfig.key, storageConfig.value);
      }, darkModeLocalStorage);
      await darkPage.reload({ waitUntil, timeout });
    } else {
      await darkPage.goto(url, { waitUntil, timeout });
    }

    // Handle class-based dark mode (e.g., Tailwind)
    if (darkModeClass) {
      await darkPage.evaluate((className) => {
        document.documentElement.classList.add(className);
      }, darkModeClass);
    }

    // Handle attribute-based dark mode (e.g., data-theme)
    if (darkModeAttribute) {
      await darkPage.evaluate((attr) => {
        document.documentElement.setAttribute(attr.name, attr.value);
      }, darkModeAttribute);
    }

    // Wait for transitions to settle
    await new Promise(resolve => setTimeout(resolve, delay));

    const darkPath = path.join(outputDir, `${urlSlug}-dark.png`);
    await darkPage.screenshot({ path: darkPath });
    console.log(`Dark mode saved: ${darkPath}`);
    await darkPage.close();
  } finally {
    await browser.close();
  }
};

// Usage examples:

// Basic — site uses prefers-color-scheme media query
captureScreenshots('https://example.com');

// Tailwind CSS dark mode (class-based)
captureScreenshots('https://example.com', {
  darkModeClass: 'dark'
});

// DaisyUI / data-theme based
captureScreenshots('https://example.com', {
  darkModeAttribute: { name: 'data-theme', value: 'dark' }
});

// localStorage-based dark mode
captureScreenshots('https://example.com', {
  darkModeLocalStorage: { key: 'theme', value: 'dark' }
});

// Combine multiple approaches for hybrid sites
captureScreenshots('https://example.com', {
  darkModeClass: 'dark',
  darkModeLocalStorage: { key: 'theme', value: 'dark' },
  width: 1200,
  height: 630,
  deviceScaleFactor: 2
});
Playwright Version
const { chromium } = require('playwright');
const path = require('path');

const captureScreenshots = async (url, options = {}) => {
  const {
    width = 1280,
    height = 720,
    deviceScaleFactor = 1,
    outputDir = '.',
    waitUntil = 'networkidle',
    timeout = 30000,
    darkModeClass = null,
    darkModeAttribute = null,
    darkModeLocalStorage = null,
    delay = 500
  } = options;

  const browser = await chromium.launch();
  const urlSlug = new URL(url).hostname.replace(/\./g, '-');

  try {
    // --- Light mode capture ---
    const lightContext = await browser.newContext({
      colorScheme: 'light',
      viewport: { width, height },
      deviceScaleFactor
    });
    const lightPage = await lightContext.newPage();

    await lightPage.goto(url, { waitUntil, timeout });

    const lightPath = path.join(outputDir, `${urlSlug}-light.png`);
    await lightPage.screenshot({ path: lightPath });
    console.log(`Light mode saved: ${lightPath}`);
    await lightContext.close();

    // --- Dark mode capture ---
    const darkContext = await browser.newContext({
      colorScheme: 'dark',
      viewport: { width, height },
      deviceScaleFactor
    });
    const darkPage = await darkContext.newPage();

    // Handle localStorage-based dark mode
    if (darkModeLocalStorage) {
      await darkPage.addInitScript((storageConfig) => {
        localStorage.setItem(storageConfig.key, storageConfig.value);
      }, darkModeLocalStorage);
    }

    await darkPage.goto(url, { waitUntil, timeout });

    // Handle class-based dark mode (e.g., Tailwind)
    if (darkModeClass) {
      await darkPage.evaluate((className) => {
        document.documentElement.classList.add(className);
      }, darkModeClass);
    }

    // Handle attribute-based dark mode (e.g., data-theme)
    if (darkModeAttribute) {
      await darkPage.evaluate((attr) => {
        document.documentElement.setAttribute(attr.name, attr.value);
      }, darkModeAttribute);
    }

    // Wait for transitions to settle
    await darkPage.waitForTimeout(delay);

    const darkPath = path.join(outputDir, `${urlSlug}-dark.png`);
    await darkPage.screenshot({ path: darkPath });
    console.log(`Dark mode saved: ${darkPath}`);
    await darkContext.close();
  } finally {
    await browser.close();
  }
};

// Usage examples:

// Basic — site uses prefers-color-scheme media query
captureScreenshots('https://example.com');

// Tailwind CSS dark mode (class-based)
captureScreenshots('https://example.com', {
  darkModeClass: 'dark'
});

// DaisyUI / data-theme based
captureScreenshots('https://example.com', {
  darkModeAttribute: { name: 'data-theme', value: 'dark' }
});

// localStorage-based dark mode
captureScreenshots('https://example.com', {
  darkModeLocalStorage: { key: 'theme', value: 'dark' }
});

// Combine multiple approaches for hybrid sites
captureScreenshots('https://example.com', {
  darkModeClass: 'dark',
  darkModeLocalStorage: { key: 'theme', value: 'dark' },
  width: 1200,
  height: 630,
  deviceScaleFactor: 2
});
The Playwright version is slightly cleaner because of the context-level colorScheme setting and the addInitScript method for localStorage injection. Both versions handle the same scenarios: media-query-based dark mode, class-based dark mode, attribute-based dark mode, localStorage-based dark mode, and any combination of these.
Edge Cases and Gotchas
Dark mode screenshots seem simple in concept, but there are several edge cases that can produce unexpected results. Here's what to watch for and how to handle each situation.
Images and SVGs with Transparency
One of the most common dark mode screenshot problems involves images with transparent backgrounds. A logo designed for light backgrounds — black text on a transparent PNG — becomes invisible or nearly invisible on a dark background. Similarly, SVG icons that use currentColor or hardcoded dark fills can disappear.
You can detect and mitigate this by injecting CSS that adds a background to images with transparency:
await page.evaluate(() => {
  const images = document.querySelectorAll('img');
  images.forEach((img) => {
    // Check if the image source is a PNG or SVG (likely to have transparency)
    const src = img.src.toLowerCase();
    if (src.endsWith('.png') || src.endsWith('.svg')) {
      img.style.backgroundColor = '#ffffff';
      img.style.borderRadius = '4px';
      img.style.padding = '4px';
    }
  });
});
This is a blunt instrument — it adds a white background to all PNG and SVG images, which may look odd on some sites. A more targeted approach is to only apply it to images that are actually transparent, but detecting transparency reliably requires decoding the image data, which adds significant complexity.
For your own sites, the better long-term fix is to ensure your images and SVGs have proper dark mode variants or use currentColor for fills so they adapt automatically. But when capturing screenshots of third-party sites, the CSS injection approach is a pragmatic workaround.
Third-Party Embeds
iframes and third-party embeds (embedded tweets, YouTube players, code snippets from GitHub Gists, Disqus comments) may not respect your color scheme emulation. This is because:
- The iframe loads content from a different origin, which has its own color scheme handling.
- Some embeds check the user's OS-level preference independently rather than inheriting from the parent page.
- Many embeds have their own theme parameter (e.g.,
twitter-widget.jsaccepts adata-themeattribute) that must be set separately.
With Playwright's context-level colorScheme, iframes within the same browser context do inherit the color scheme setting. This handles many cases — if the embed responds to prefers-color-scheme, it will pick up the dark mode preference from the Playwright context. But embeds that use JavaScript to check the preference and then apply their own class-based theme may still need special handling.
For embedded tweets specifically, the Twitter embed API accepts a theme parameter:
<blockquote class="twitter-tweet" data-theme="dark">
If you are capturing a page with embedded tweets and need them in dark mode, you can inject this attribute before the Twitter widget script processes them:
await page.evaluate(() => {
  const tweets = document.querySelectorAll('.twitter-tweet');
  tweets.forEach((tweet) => {
    tweet.setAttribute('data-theme', 'dark');
  });
});
In practice, if you are capturing screenshots of pages you control, you can build dark mode awareness into the embed configuration. For third-party sites, accept that some embeds may appear in light mode even when the rest of the page is dark. This is a limitation of the web platform, not your tooling.
JPEG Compression on Dark Backgrounds
JPEG compression artifacts are more visible on dark, solid-colored backgrounds than on light ones. This is because JPEG's lossy compression algorithm creates blocky artifacts in smooth gradients and solid regions, and the human eye perceives these artifacts more readily against dark colors.
If your dark mode screenshots will be displayed at full resolution or where quality matters — documentation, marketing pages, design review — use PNG or high-quality WebP instead of JPEG:
// PNG — lossless, no artifacts, larger file size
await page.screenshot({ path: 'dark-mode.png', type: 'png' });

// WebP — good compression with minimal artifacts
await page.screenshot({ path: 'dark-mode.webp', type: 'webp', quality: 95 });

// JPEG — if you must use JPEG, increase quality
await page.screenshot({ path: 'dark-mode.jpg', type: 'jpeg', quality: 95 });
For dark mode social cards where file size matters (platforms impose limits on OG image size), WebP at quality 90-95 gives the best balance of file size and visual fidelity on dark backgrounds. PNG is ideal for pixel-perfect screenshots but produces larger files. JPEG at the default quality setting (often 75-80) will show visible banding in dark gradient areas.
CSS Transitions and Animations
Many sites animate the transition between light and dark mode. When you toggle the theme programmatically, these transition animations start, and if you capture the screenshot immediately, you may get a partially-transitioned state — text halfway between colors, backgrounds in a blended state, elements mid-fade.
Add a delay after toggling the theme to let transitions complete:
// After toggling dark mode class or attribute
await page.evaluate(() => {
  document.documentElement.classList.add('dark');
});

// Wait for CSS transitions to finish
// Most theme transitions are 200-300ms, so 500ms is a safe buffer
await page.waitForTimeout(500);

await page.screenshot({ path: 'dark-mode.png' });
If you want to be more precise, you can disable CSS transitions entirely before switching themes:
await page.evaluate(() => {
  // Disable all transitions
  const style = document.createElement('style');
  style.textContent = '*, *::before, *::after { transition: none !important; animation: none !important; }';
  document.head.appendChild(style);

  // Apply dark mode
  document.documentElement.classList.add('dark');
});

// No delay needed — transitions are disabled
await page.screenshot({ path: 'dark-mode.png' });
Disabling transitions gives you an instant, clean screenshot without any intermediate states. This is generally the better approach for automated screenshot capture because it produces consistent results regardless of how the site implements its theme transition.
System vs. Explicit Dark Mode
Some websites have three theme options: light, dark, and system (auto). The "system" option follows the OS preference via prefers-color-scheme, while light and dark are explicit overrides that typically apply a CSS class and store the choice in localStorage.
For these sites, emulating prefers-color-scheme: dark only works if the user hasn't previously selected an explicit theme. If the site has localStorage.theme = 'light' set, the explicit preference overrides the system preference, and your prefers-color-scheme emulation has no effect.
The safest approach for these three-mode sites is to combine the media feature emulation with the explicit preference:
// Puppeteer approach for three-mode sites
await page.emulateMediaFeatures([
  { name: 'prefers-color-scheme', value: 'dark' }
]);

await page.goto(url, { waitUntil: 'domcontentloaded' });

await page.evaluate(() => {
  // Clear any explicit light mode preference
  localStorage.removeItem('theme');
  localStorage.removeItem('color-theme');
  localStorage.removeItem('preferred-theme');

  // Or explicitly set dark mode
  localStorage.setItem('theme', 'dark');

  // Also apply the class in case the site uses class-based switching
  document.documentElement.classList.add('dark');
  document.documentElement.classList.remove('light');
});

await page.reload({ waitUntil: 'networkidle0' });

await page.screenshot({ path: 'dark-mode.png' });
This belt-and-suspenders approach ensures dark mode is active regardless of which implementation strategy the site uses. It is more code, but it handles the widest range of real-world dark mode implementations.
Flash of Unstyled Content (FOUC)
Some sites experience a brief flash of their default theme before the JavaScript-applied dark mode takes effect. This happens because the HTML loads with light mode styles, and dark mode is applied via JavaScript after the DOM is ready. If your screenshot captures too early, you get the light mode flash.
The addInitScript approach in Playwright handles this well because the script runs before the page's own JavaScript. In Puppeteer, navigating to the page, setting localStorage, and reloading achieves the same result but requires two page loads.
If FOUC is a problem, another option is to inject a style that hides the page until dark mode is applied:
await page.addInitScript(() => {
  // Hide the page until dark mode is ready
  const style = document.createElement('style');
  style.id = 'dark-mode-fouc-fix';
  style.textContent = 'body { opacity: 0 !important; }';
  document.documentElement.appendChild(style);

  // Set the dark mode preference
  localStorage.setItem('theme', 'dark');

  // Remove the hiding style after a short delay
  setTimeout(() => {
    const el = document.getElementById('dark-mode-fouc-fix');
    if (el) el.remove();
  }, 100);
});
Dark Mode Social Cards
Dark mode screenshots make excellent social cards. When someone shares your link on Twitter, LinkedIn, or Slack, a dark social card stands out in feeds that are predominantly light-colored. The visual contrast draws the eye and can improve click-through rates.
Here is a pattern for generating both light and dark variants of OG images so you can choose which to use — or even serve different versions based on time of day or user preference:
const { chromium } = require('playwright');

const generateSocialCards = async (templateUrl, options = {}) => {
  const {
    title = 'Untitled',
    outputDir = '.'
  } = options;

  const browser = await chromium.launch();

  const variants = [
    { scheme: 'light', suffix: 'light' },
    { scheme: 'dark', suffix: 'dark' }
  ];

  for (const variant of variants) {
    const context = await browser.newContext({
      colorScheme: variant.scheme,
      viewport: { width: 1200, height: 630 },
      deviceScaleFactor: 2
    });
    const page = await context.newPage();

    const url = `${templateUrl}?title=${encodeURIComponent(title)}`;
    await page.goto(url, { waitUntil: 'networkidle' });

    const slug = title.toLowerCase().replace(/\s+/g, '-').replace(/[^a-z0-9-]/g, '');
    const filename = `${slug}-og-${variant.suffix}.png`;
    await page.screenshot({ path: `${outputDir}/${filename}` });
    console.log(`Generated: ${filename}`);

    await context.close();
  }

  await browser.close();
};

// Generate both variants
generateSocialCards('https://yoursite.com/og-template', {
  title: 'Dark Mode Screenshots with Puppeteer'
});
When using dark mode social cards, keep these tips in mind:
- Test on multiple platforms. Twitter, LinkedIn, and Slack all render OG images slightly differently. Some add rounded corners, some add subtle shadows, and the surrounding UI varies. A dark social card looks great on Twitter's white timeline but may blend in on Slack's dark sidebar.
- Ensure text contrast. Light text on a dark background needs enough contrast to be readable at small sizes. Social card previews are often displayed at reduced resolution, so subtle color differences may become illegible.
- Use
deviceScaleFactor: 2. Social cards at 1200x630 CSS pixels rendered at 2x produce a 2400x1260 image, which looks crisp on high-DPI displays and gives platforms enough resolution to work with.
For a complete guide on building social card templates and integrating them with your meta tags, see our social cards guide.
Visual Regression Testing with Dark Mode
If your application supports dark mode, your visual regression tests need to cover both themes. A CSS change that looks fine in light mode might break the layout in dark mode — different background colors can expose spacing issues, text can become unreadable if colors clash, and components that rely on borders for separation might lose their definition against a dark background.
Playwright's built-in visual comparison API makes this straightforward. You can capture baseline screenshots for both themes and detect regressions in either:
const { test, expect } = require('@playwright/test');

test('homepage matches visual baseline in light mode', async ({ page }) => {
  await page.emulateMedia({ colorScheme: 'light' });
  await page.goto('https://yoursite.com');
  await expect(page).toHaveScreenshot('homepage-light.png');
});

test('homepage matches visual baseline in dark mode', async ({ page }) => {
  await page.emulateMedia({ colorScheme: 'dark' });
  await page.goto('https://yoursite.com');
  await expect(page).toHaveScreenshot('homepage-dark.png');
});
The toHaveScreenshot method compares the current screenshot against a stored baseline. On the first run, it creates the baseline. On subsequent runs, it diffs the current screenshot against the baseline and fails the test if they differ beyond a configurable threshold.
You can also parameterize tests to avoid duplication:
const { test, expect } = require('@playwright/test');

const themes = ['light', 'dark'];
const pages = ['/', '/pricing', '/docs', '/blog'];

for (const theme of themes) {
  for (const pagePath of pages) {
    test(`${pagePath} visual regression (${theme} mode)`, async ({ page }) => {
      await page.emulateMedia({ colorScheme: theme });
      await page.goto(`https://yoursite.com${pagePath}`, {
        waitUntil: 'networkidle'
      });
      await expect(page).toHaveScreenshot(`${pagePath.replace(/\//g, '-')}-${theme}.png`, {
        maxDiffPixelRatio: 0.01
      });
    });
  }
}
This generates a test for every combination of page and theme, giving you comprehensive coverage. The maxDiffPixelRatio option controls how many pixels can differ before the test fails — a small value like 0.01 (1%) catches real regressions while tolerating minor rendering differences between runs (anti-aliasing, font hinting).
For CI pipelines, store the baseline screenshots in your repository. When a test fails, Playwright generates a diff image showing exactly which pixels changed, making it easy to tell whether the change is intentional (a design update) or a regression (a broken style).
When to Use an API Instead
Setting up dark mode screenshot capture with Puppeteer or Playwright involves several moving pieces: choosing between media query emulation and class injection, handling the different dark mode implementations across sites, dealing with image transparency, managing transition timing, and selecting the right output format for dark backgrounds. For a handful of screenshots, this is manageable. For ongoing, at-scale capture, the complexity adds up.
RenderScreenshot supports dark mode capture with a single parameter. No browser management, no class detection, no transition timing:
curl "https://api.renderscreenshot.com/v1/screenshot?url=https://example.com&dark_mode=true" \
  -H "Authorization: Bearer rs_live_..."
The API automatically handles prefers-color-scheme emulation, waits for transitions to settle, uses PNG for dark mode captures to avoid JPEG artifacts, and applies the right output optimization. For class-based dark mode sites, you can pass additional configuration to specify the dark mode strategy.
You can combine dark_mode with other parameters — viewport size, full-page capture, device emulation, element selectors — just as you would in Puppeteer or Playwright, but without running your own browser instances:
curl "https://api.renderscreenshot.com/v1/screenshot?\
url=https://example.com&\
dark_mode=true&\
width=1200&\
height=630&\
format=webp&\
quality=95" \
  -H "Authorization: Bearer rs_live_..."
Sign up for free and get 50 credits to try it out. That's enough to generate both light and dark mode screenshots for 25 pages and see if the API fits your workflow.
Related Guides
- Taking Screenshots with Puppeteer — Puppeteer screenshot fundamentals
- Taking Screenshots with Playwright — Playwright screenshot fundamentals
- How to Generate Social Cards with Screenshots — Dynamic social card generation
- Best Screenshot API Comparison — When to use an API instead
Have questions about dark mode screenshots? Check our documentation or reach out at [email protected].